Focus Magic
A review by Craig Lamson
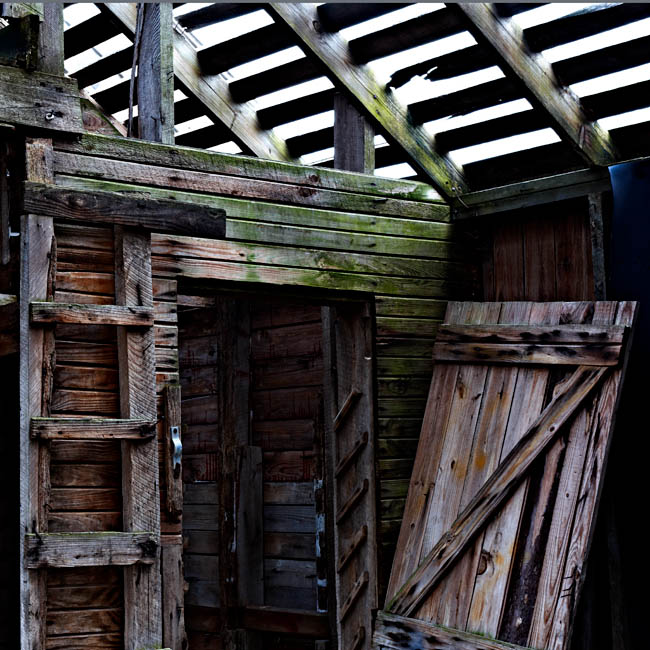
"Going up? Or coming down?" copyright Craig Lamson 2009
How sharp is sharp?
|
Today’s high resolution DSLR cameras such as the Canon 1DsMkIII among others produce stunning images right out of the camera. That is until you pixel peep at 100% or more in Photoshop. Then it becomes abundantly clear that something is robbing your very expensive camera of sharpness. The culprit is the so called “anti aliasing” filter mounted in front of your sensor. Normally this filter is a good thing and the camera makers put it there for a good reason. Without going into a detailed scientific explanation of why this filer is important, let’s just accept that it removes artifacts in our images that we would find offensive and might require hours of post production work to remove. These filters work by slightly blurring the image before it reaches the sensor to help keep artifacts like moiré and edge stair stepping to a minimum. Anti- aliasing filters can be quite helpful but how do we overcome the loss of sharpness they induce?
Since the beginning of the post processing of
digital imaging, photographers have searched for a method to reduce the
blur caused by the anti aliasing filter.
By far the most common practice is the use
of the Wikipedia describes disconvolution as:
“In optics
and imaging, the term "deconvolution" is specifically used to refer to
the process of reversing the optical distortion that takes place in an
optical microscope, electron microscope, telescope, or other imaging
instrument, thus creating clearer images. It is usually done in the
digital domain by a software algorithm, as part of a suite of microscope
image processing techniques. Deconvolution is also practical to sharpen
images that suffer from fast motion or jiggles during capturing. Early
Hubble Space Telescope images were distorted by a flawed mirror and
could be sharpened by deconvolution.”
That’s a
mouthful but in laymans terms the software resamples the image to remove
the blur.
Focus Magic
fills the need.
There
are a number of progams available to provide deconvolution.
By far my favorite is Focus Magic by
Acclaim Software Ltd. Focus Magic is available for both PC and Mac platforms and runs as a standalone or as a plug-in for many of the standard photo editing programs such as Photoshop. It is priced at a very reasonable $45.00 US
Focus Magic bills itself as an image
restoration program, and can refocus, defocus, remove motion blur,
resize, and de-speckle images.
While I’ve briefly played with all of
the features I generally only use refocus as a Photoshop plug-in as
part of my raw conversion process.
I will be limiting this review to this
aspect of Focus Magic
|
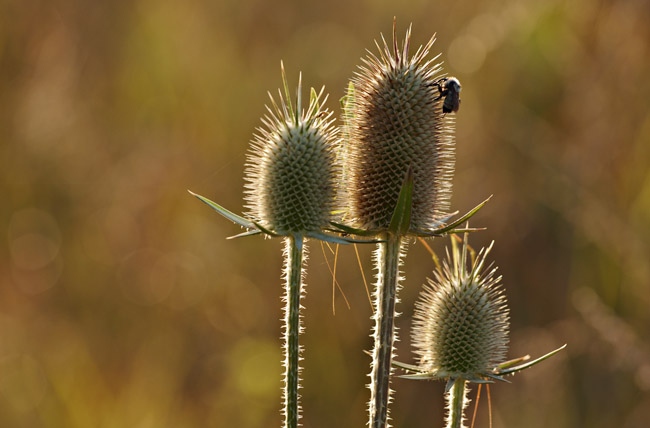
"1...2...3" copyright Craig Lamson 2009
|
One man’s workflow…. As I mentioned I find Focus Magic to be essential to my raw processing workflow. My preferred camera is a Canon 1DsmkIII and I find it has a fairly heavy AA filter. Focus Magic does a superb job of reducing the effects in my processed files. My personal workflow is as follows, but it should not be considered as a gold standard, it is simply my personal choice. Regardless of your camera or processing habits Focus Magic will work for you. I always shoot raw and my first step is to create a tiff file for post processing by running my Canon files through Phase One Capture One Pro version 4. I prefer to turn off all file sharpening in Capture One and do my capture sharpening in Photoshop. Once my file has been exported to Photoshop I complete all my retouching and layers work before applying any filters. Since I layer most of my important images it is important not to apply any re-sampling to the images that might effect critical pixel level alignment between layers. When I am satisfied with my image I’ll flatten the file and then sharpen first with Focus Magic plug-in via the filters menu dropdown. |
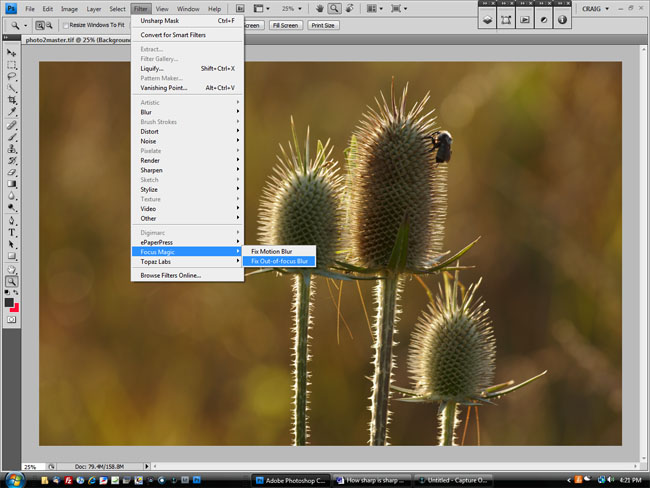
The Focus Magic plug-in is activated from the filters menu.
|
Upon opening, Focus Magic will check the image and recommend a “blur width” for your image as well as selecting digital camera as the source. Some will find this helpful but I would prefer that the UI would remember the last settings used. At this point you can either accept the recommended amount, check for yourself by positioning the red box on a specific area of the frame and hitting the detect button, or by simply entering the blur amount manually. |
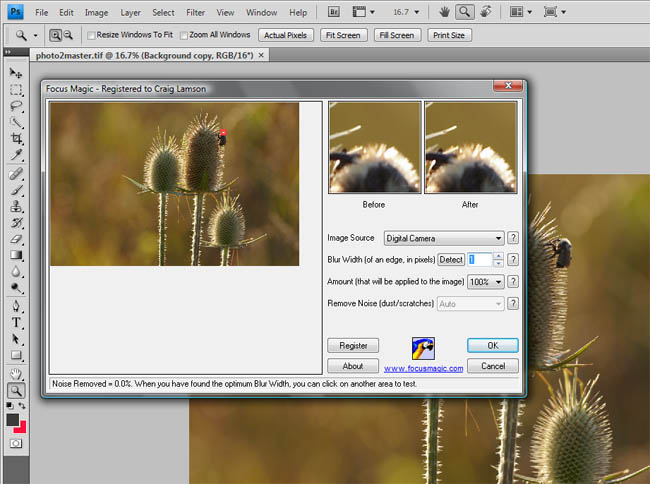
The interface of the Focus Magic plug-in is simple and easy to use.
|
In addition you can adjust the amount of refocusing to apply in percentages from 0% to 300%, and to specify noise removal parameters. My standard settings for refocusing are a 1 pixel width, 100%, no noise removal. After applying the Focus Magic filter I usually adjust the final look of the image by fading the filter effects using the Edit>Fade command in Photoshop to taste. The final step in my capture sharpening routine is to apply a local contract adjustment using either a custom made Photoshop action or commercial software such as Topaz Detail.
Let’s review the results. With Focus Magic it is easy to overdo the process and create artifacts in your images. Below are examples of a 1 pixel width blur at 0%, 100% and 300%. Notice how the image begins to get crunchy as the percentages increase. Remember, the goal here is to just eliminate the effects of the AA filter, not to over sharpen the image. We can always add more sharpening later when we do output sharpening, which is reproduction size dependant. |
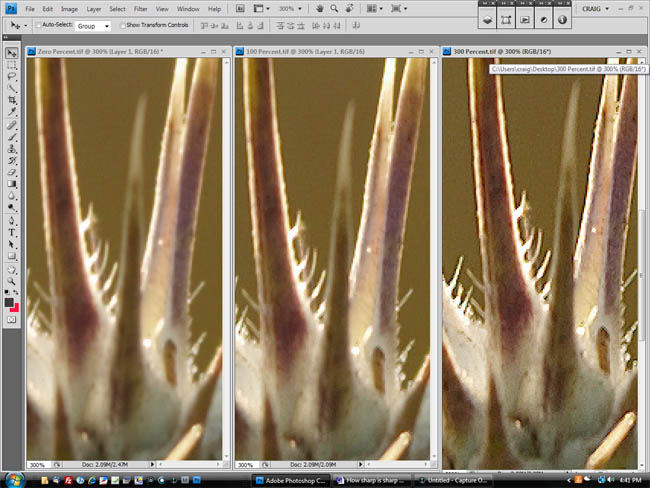
From left to right: 1 Pixel width at 0%, 100% and 300%
|
Selecting too large of a pixel width can be both helpful and harmful. Given the resolution demands of today’s DSLR cameras, I always try and use a tripod when possible to assure tack sharp images. However, there are times when you must handhold the camera and that will often take the edge off the sharpness of your images. On those rare occasions you might want to use a larger blur width such as two or three pixels to attempt to recover some of the lost sharpness. You will need to experiment to find the right settings for each image. Just be careful. Too many pixels of width and you start to create artifacts as the images below illustrate. |
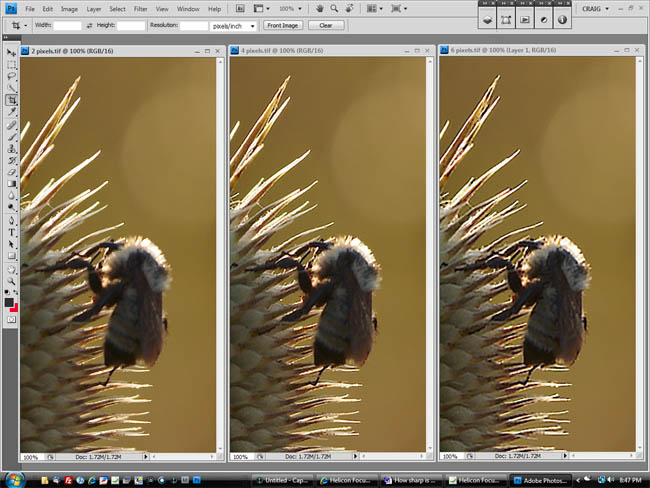
Pixel width at 100% from left to right: 2 pixels, 4 pixels, 6 pixels.
|
The good, the bad and the ugly. While not perfect Focus Magic has earned a valued place in my digital image processing workshop and is used on most every image I produce. It does a masterful job of reducing the effects of image blur cased by slight camera movement and the ever present AA filter. The weak points in my opinion are the lack of sticky settings in the user interface and the slowness of the program even on a fairly speedy computer. I understand that the calculations required are enormous. Both of these issues are minor when compared the quality this program produces. That leaves us with the ugly. While Focus Magic itself is not to blame, the possibility exists for a user to overdo the refocusing and create some truly ugly results. My hard learned advice is that less is more. All in all, Focus Magic is, in my opinion, a must have addition to the workflow of any serious photographer. Those who are less serious will also find this software invaluable for restoring old photos and perhaps salvaging the inevitable botched image. |
About the author
Craig Lamson has been a professional advertising
photographer for nearly three decades.
His work can be found at:
www.craiglamson.com